- 更新日:
- 公開日:
Photoshopで床への映り込み(鏡面反射)した画像を作る方法
ずいぶんと前からですが、床に反射した効果で透明感を演出する画像加工が流行っています。appleが一昔前に、Macなどの製品画像が床に映り込んでいた加工法を使っていました。現在でも、化粧品の広告や等身大の人物、ロゴ等のテキストによく利用されています。
このページを見ている人におすすめの商品
![Photoshopレタッチ [伝わる]写真補正&加工を学ぶ現場の教本](https://m.media-amazon.com/images/I/51AIkYI2dbL._SL160_.jpg "Photoshopレタッチ [伝わる]写真補正&加工を学ぶ現場の教本")
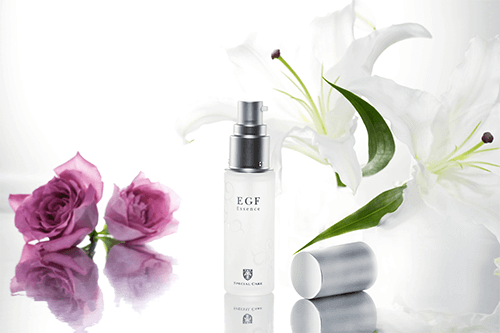
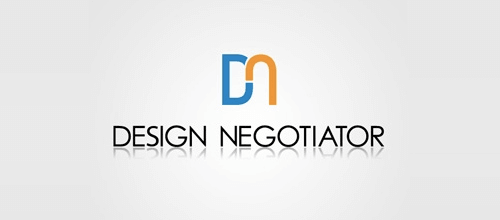
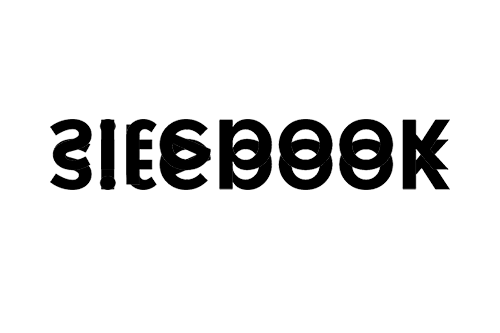
鏡面反射した画像加工の例
化粧品の広告デザイン
鏡面加工により高級感・透明感を演出しております。磨かれた床に置かれているので、清潔感も感じられます。

ロゴデザイン
ロゴの映り込みは、フラットデザインの流行により最近はあまり見られなくなりました。しかし鏡面仕上げにすることにより、信頼感が生まれます。

使用ソフト
Adobe Photoshop CCを使用

素材の用意
今回はsitebookのロゴ画像を使用します。
Step1.画像を開く
[ファイル > 開く]を選択し、鏡面加工をしたい画像を選択します。

レイヤーが配置されました
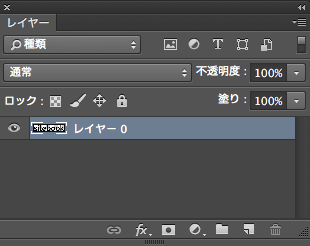

Step2.レイヤーを複製する
[command + J]でレイヤーを複製いたします。
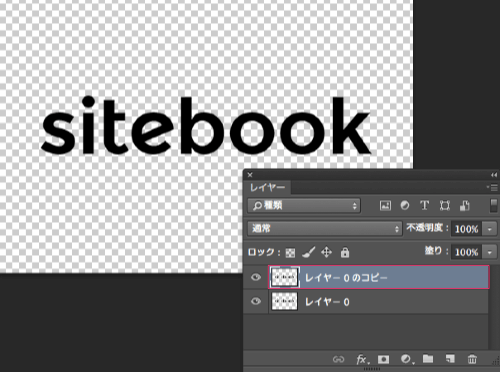
Step3.複製したレイヤーを反転(リフレクト)させる
[編集] → [変形] → [垂直方向に反転]を選択し、ロゴを反転させます。
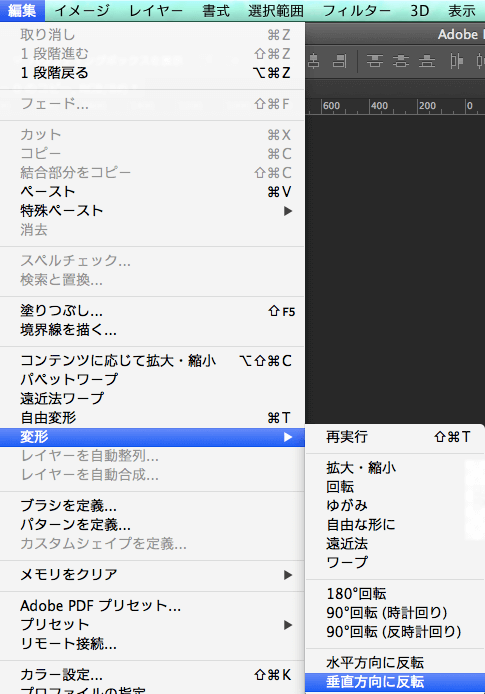
反転しました。
反転させたレイヤーを下に移動させます。

Step4.レイヤーマスクを追加する
先ほど下に移動したレイヤーに、レイヤーマスクを追加します。
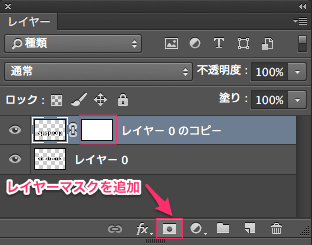
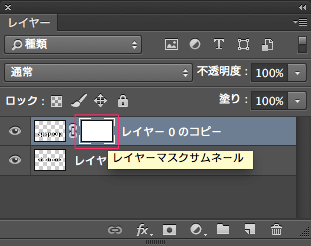
追加されたレイヤーマスクをクリックし、選択した状態にします。
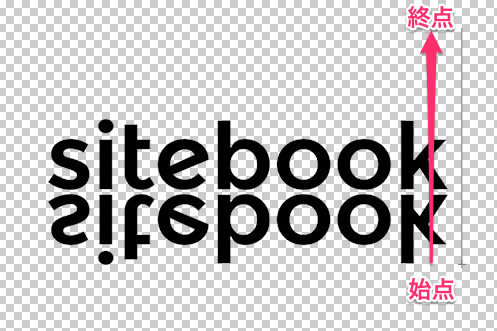
Step5.透過グラデーションをかける
左サイドナビのツールパネルの[グラデーションツール]を選択して、上部のグラデーションを[黒、白]に選択する。
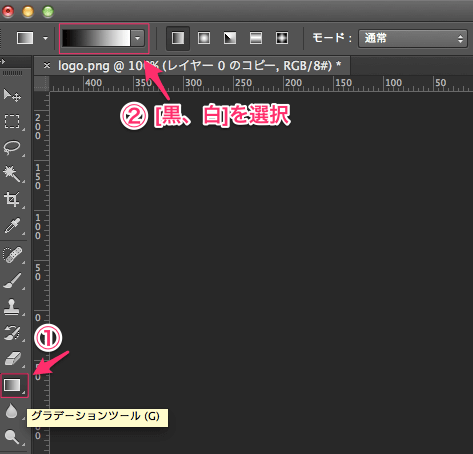
グラデーションを掛けたい箇所を始点から終点まで指定する。始点は不透明度0%、終点が不透明度100%。
完成
完成です。